
Why Kaltura?
For many websites that want to provide Video Content, using
public providers such as YouTube is just enough to
fulfill their needs.
However if you need advanced features such as embedding your own
ads, distribute live broadcasts, use DRM,
or create a private video site, a professional Video Platform like
Kaltura is a
very good option.
Bandwidth Considerations
- It is important to have in mind that Audio and Video streaming
services may consume a lot of bandwidth depending on the size of
our audience, so you must be very careful when considering using
your private cloud to do so.
- The standard Cloud-Bricks configuration provides 100Mbps of
bandwidth, so you may want to consider upgrading to 1Gbps in
order to support a larger audience.
- If 1Gbps is not enough for your needs please consider using our Content Distribution Network.
Protocols Supported
The Kaltura/Cloud-Bricks integration supports the following
protocols:
- Broadcast encoding: RTMP using H.264 for Video and AAC for audio.
- Live Streaming distribution: Apple HLS.
- Video On Demand Upload: MP4 Video.
- Video On Demand distribution: Apple HLS (default),
Adobe HDS and MPEG-DASH.
Creating a Kaltura Virtual Machine
- If you want to use the Kaltura integration provided by
Cloud-Bricks, please start by creating a new
virtual machine.
- We suggest at least 4 vCPUs, 8GB of RAM and one IPv4 NAT
address.
- Do not forget to allocate enough disk space for your video storage.
- When selecting an operating system please use the "Kaltura Video Platform" option.
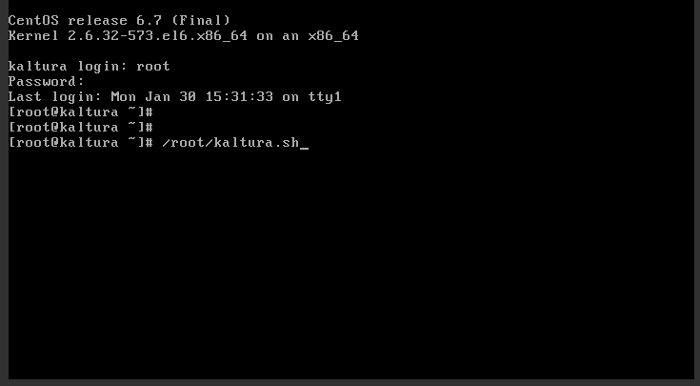
- We use CentOS as the base platform for Kaltura, so as usual after installation you must assign a root password, then login as root.
- After your fist login, please execute the /root/kaltura.sh
script.
- The kaltura.sh script will ask you for your email address (login) and a password to access the Kaltura Administration Console.
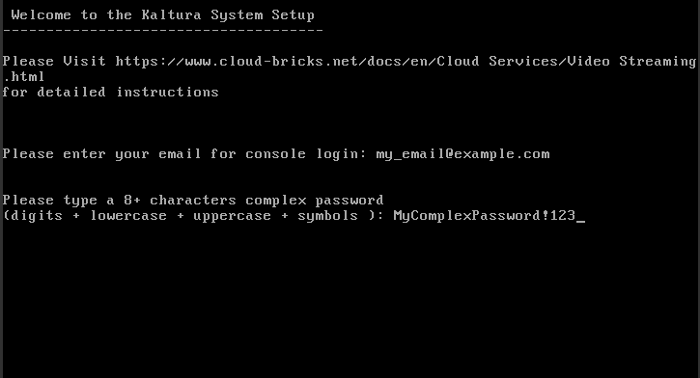
- Please be patient, the installation my take several minutes to complete.
Configuring the Streaming Service
- If you have finished the installation of your Kaltura Virtual Machine, you may proceed to integrate it to the Cloud-Bricks streaming service.
- In the Cloud-Bricks interface, please navigate to "Cloud Services" -> "Streaming Servers" and click on "New Streaming Server..."
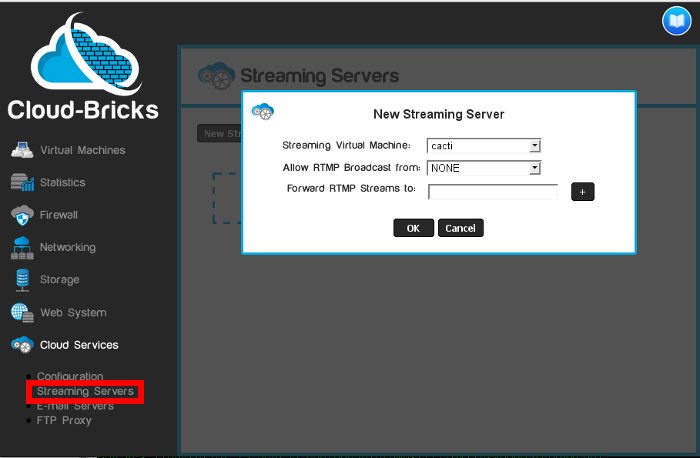
- Streaming Virtual Machine: Please select the virtual machine you have just installed with the Kaltura software.
- Allow RTMP Broadcasts from: If you want to create live
broadcasts you have to create a Firewall Object
with the list of IP address that will be authorized to serve as
Stream sources.
- Forward RTMP Streams to: If you want to re-transmit such live broadcast to other servers, you may include a list of IPs and ports that will act as destinations for your live stream data.
Click "OK" and then click on "Commit changes"
- The system will create a Web Server object
and a Virtual
Host for your Kaltura virtual machine, and all the
required networking for your streaming service to work.
Streaming URLs
After creating your "Streaming Server" configuration, the system
will provide a set of 3 URLs:
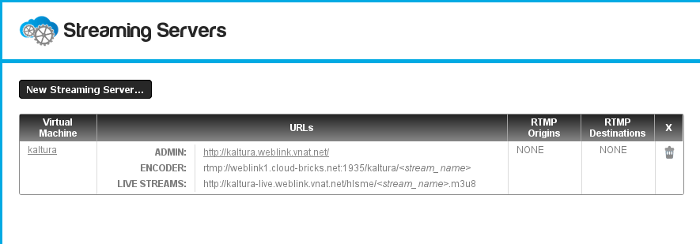
- ADMIN: Is the URL you will need to manage your Kaltura
System using your web browser.
- ENCODER: This is the information required for a stream encoder software to transmit live streams to the Cloud-Bricks system.
- LIVE STREAMS: This is the URL that you will insert into the Kaltura Software to include a live stream in the Kaltura Player.
The "<stream_name>" string must be replaced with the name
given to each live stream in your encoder software.
Basic Kaltura Usage
- Please update your
computer's Flash Player before working with Kaltura.
- If you access your Admin URL you will see the Kaltura "Get
Started" page:
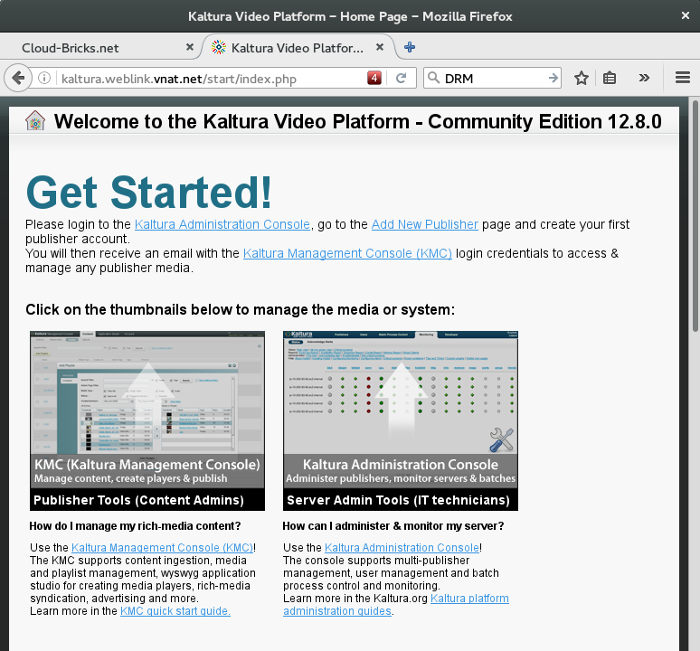
Here you have two main applications:
- Kaltura Administration Console: This is your starting
point to manage your Kaltura System and create "Publishers"
which are the users that will be able to upload content into the
system.
- KMC (Kaltura Management Console): This is the application that will be used by content "Publishers" to manage their video content.
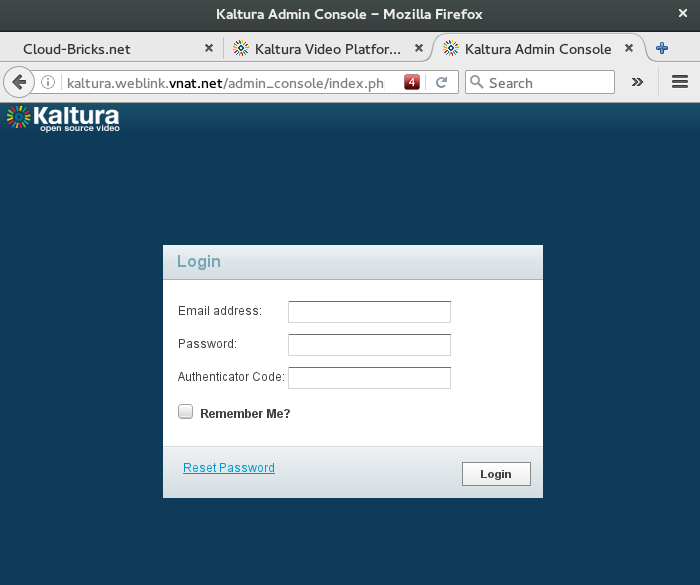
Log into the Kaltura Administration Console
Use the email (login) and password provided during the Kaltura
Virtual Machine installation (kaltura.sh script) to log into the
Kaltura Administration Console:
Create a new Publisher
Your first administration task is to create a new publisher, that is, a new content user: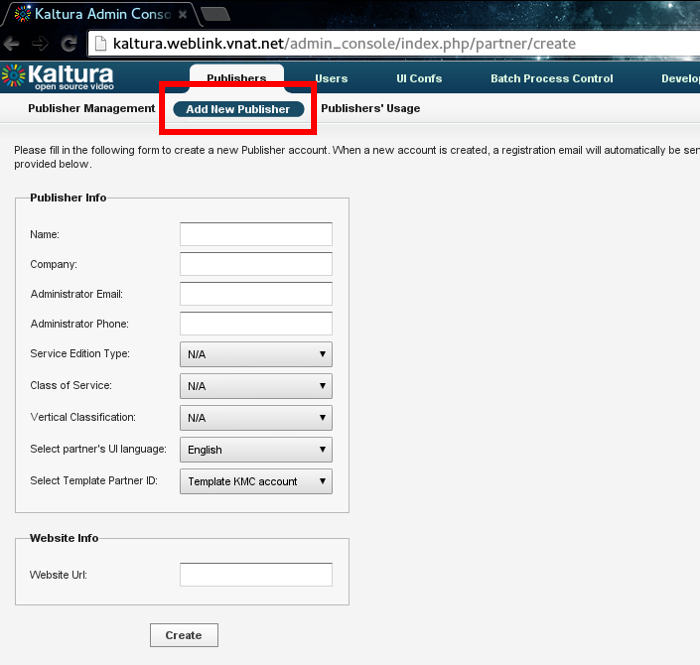
- Please fill all the fields including a real working email.
- The system will send a link to the user's email in order to activate the account and to be able to create a password for the Kaltura Management Console.
Using the Kaltura Management Console
With the Publisher's email and password created in the previous step, log into the KMC: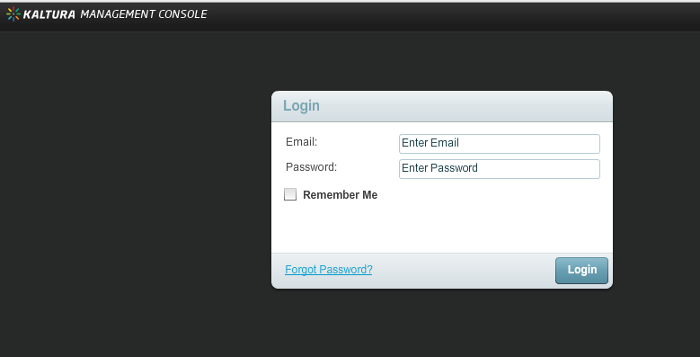
The KMC welcome screen appears:
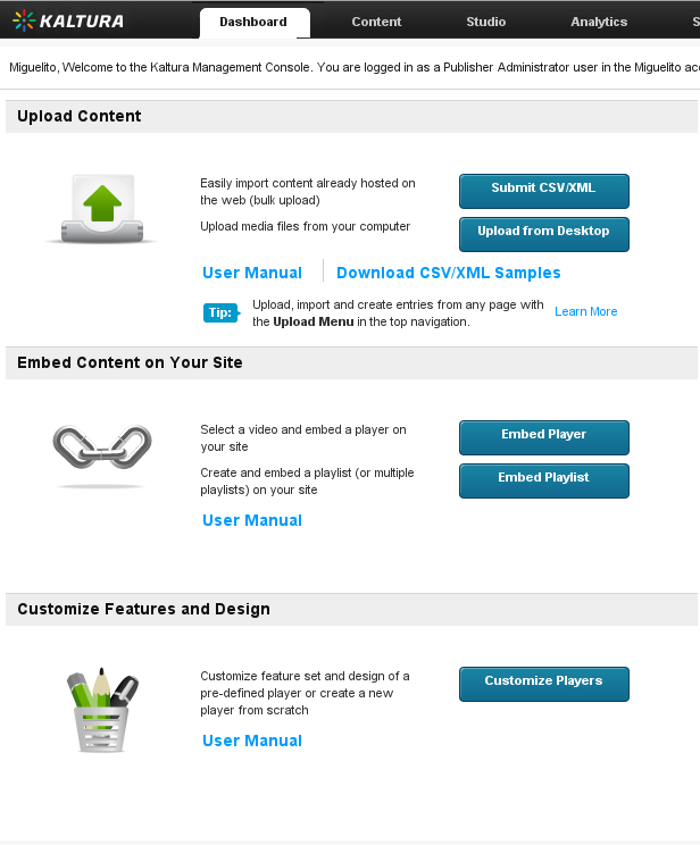
- Please take your time to read the documentation so you can learn how the Kaltura system works.
Create a new player
- Your first publishing task is to create a player.
- The player will be the interface that will appear in your
website to reproduce your video content.
- Please click into the "Studio" tab and then in "Add New Player" button.
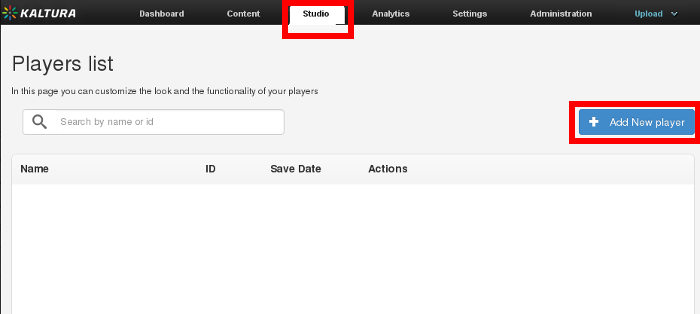
The "New Player" screen appears:
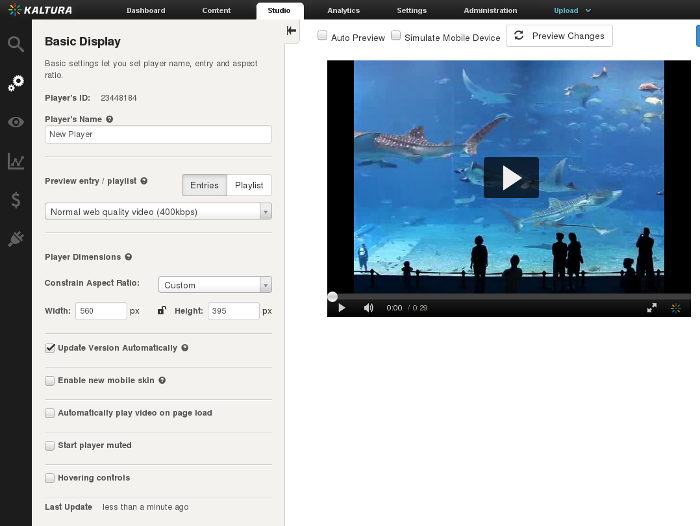
- In this screen you will be able to customize your player look and feel and functionality.
- You will be able to integrate your ads and statistics systems.
- We recommend you to use "Google Analytics" to track your video
views.
- Use the preview in the right to see how your configuration changes affect the player.
- When you are done press the "Save Player Settings" button.
Upload a video
The "Content" tab will show you all the available videos, to upload a new one use the "Upload from Desktop" option from the "Upload" menu:
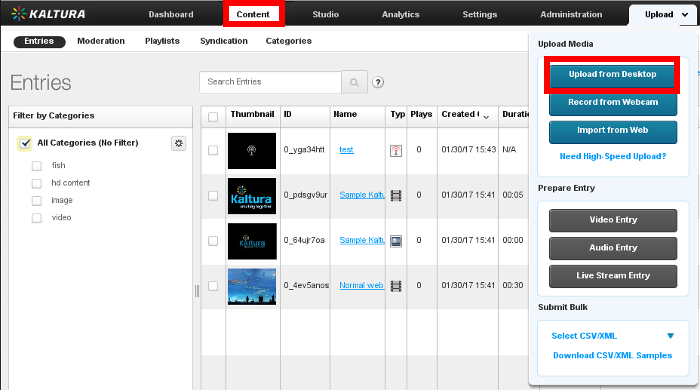
- Select a MP4 file from your computer.
- The "Upload Settings" screen will appear:
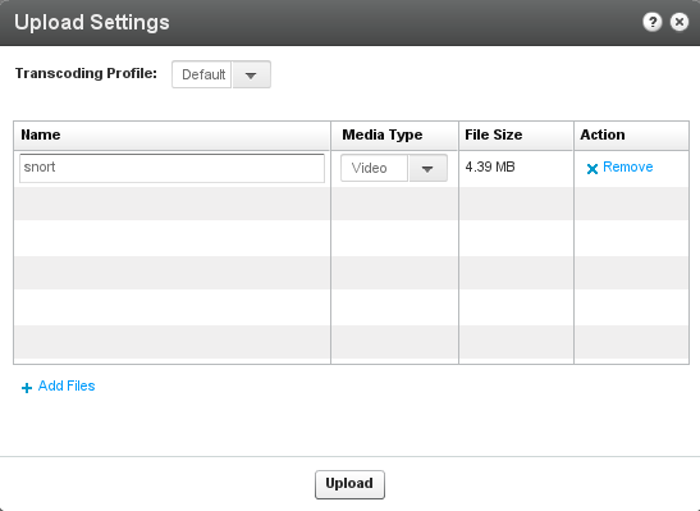
- Press the "Upload" button
- Your video will appear in "Uploading" status and after a while it will change to "Converting"
- When the content conversion finishes the video will be ready to use.
- In the "Select Action" menu click on "Preview and Embed"
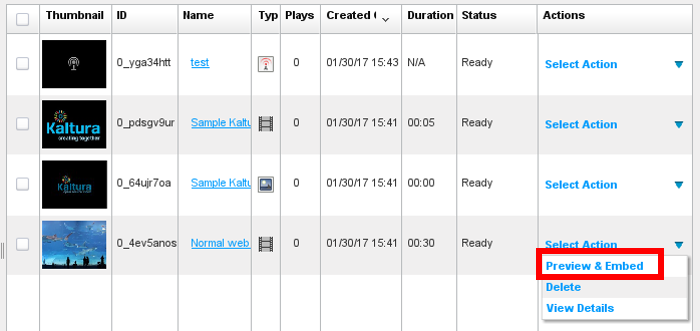
- The system will show you a preview of your video.
- The JavaScript code that you will need to embed the video in your web site is available at the left side of the screen:
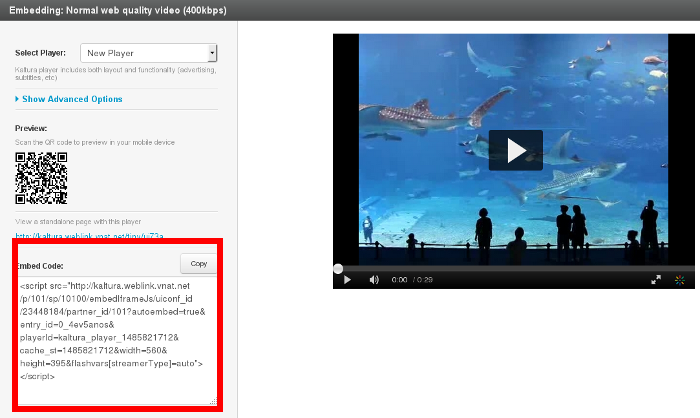
In order to make it easier to embed videos into web sites, Kaltura is integrated with many Content Management Systems, like WordPress or Drupal.
Live Streaming
- If you want to Broadcast a live event, you will need to connect your camera or video feed to a computer with an encoder software.
- Any encoder supporting the RTMP protocol, H.264 video and AAC audio will be OK.
- We have tested Adobe Flash Media Encoder and OBS Studio with success.
- In your encoder program configure the "ENCODER" URL provided by the Cloud-Bricks system (see "Streaming URLs" before in this manual) and assign a name to the stream.
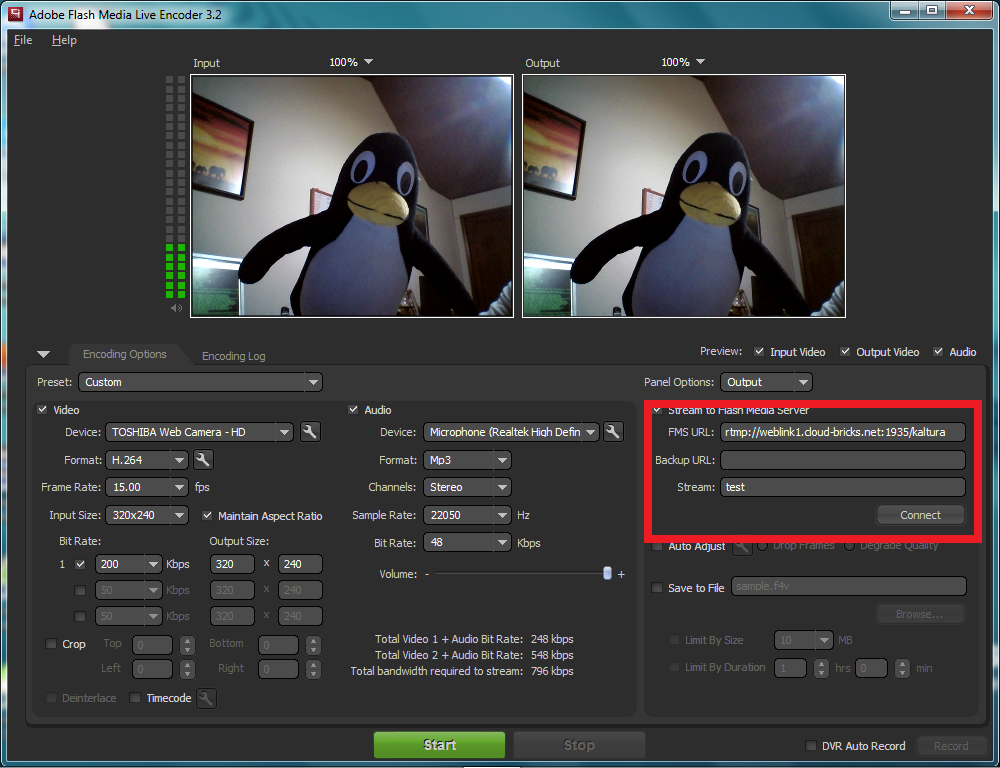
- Do not forget to configure H.264 format for video and AAC for audio.
- You may start broadcasting when you are ready.
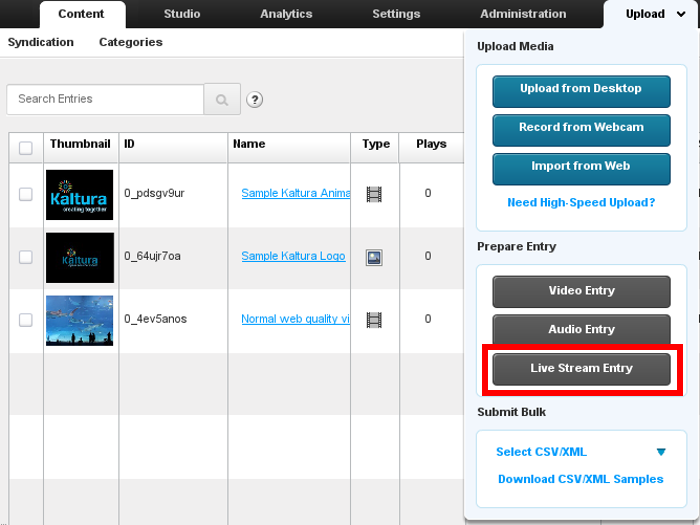
- In the Kaltura Management Console, select the "Live Stream Entry" option from the "Upload" menu.
- The "Add New Stream" window appears:
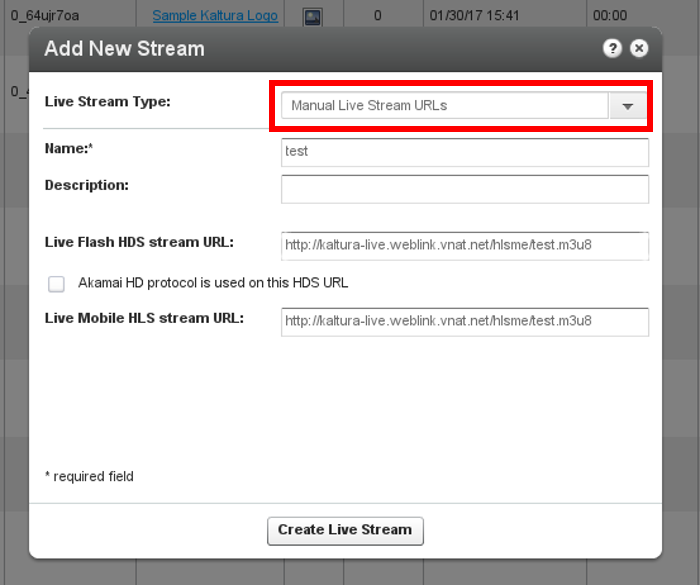
- It is mandatory to use the "Manual Live Stream URLs" option from the "Live Stream Type" menu.
- Do not select the "Akamai HD protocol.." check box.
- The Stream URL correspond to the "LIVE STREAMS" URL (see
"Streaming URLs" before in this manual) format, that is:
http://<kaltura_virtual_machine_name>-live.<cloud_bricks_customer_name>/hlsme/<stream_name>.m3u8 - Please repeat the URL twice for both URL fields in this window.
- Press the "Create Live Stream" button.
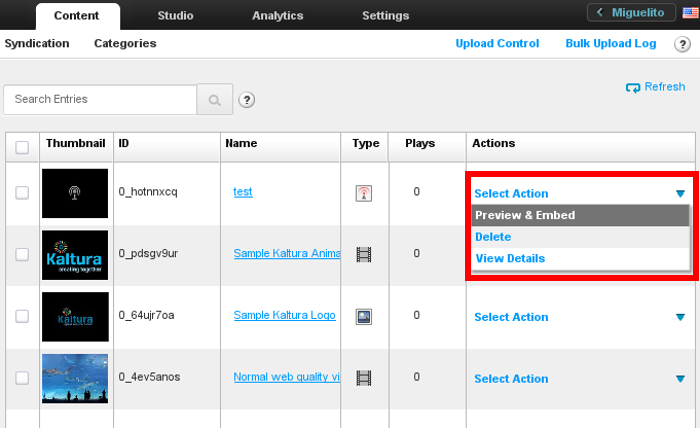
- In the "Content" window, locate your recently created live stream entry.
- In the "Select Action" menu click on "Preview and Embed":
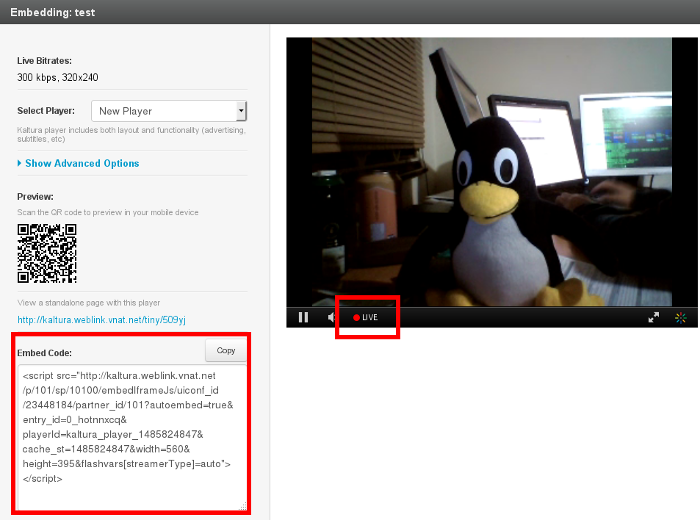
- In the same way you work with video files, you will be able to preview your video stream and select the code to embed it into your web site:
Kaltura encryption
- In the Cloud-Bricks/Kaltura integration, you may protect your Kaltura management applications with HTTPS encryption.
- You can do that in the same way you secure any Virtual host, that is, by uploading a SSL certificate and selecting the HTTPS protocol in the Virtual Host that has the same name as your Kaltura Virtual Machine.
- Video Stream encryption is not supported in the Cloud-Bricks platform, but you may use Kaltura's DRM technology to protect your content.
Kaltura Support
Cloud-Bricks support for Kaltura does not go too far beyond this
document, and our support team is not able to provide specific
support on the Kaltura's software. So you may use the following
sources to get support :